A strong selfie should still look like you
A flattering selfie does not require a “perfect” face or a filter that reshapes your features. Treat it as a compact portrait: light, distance, lens choice, composition and timing matter more than a beauty preset. Aim for a clear photograph that feels like you, without aggressive smoothing or body alteration.
Start with a clean lens and useful light
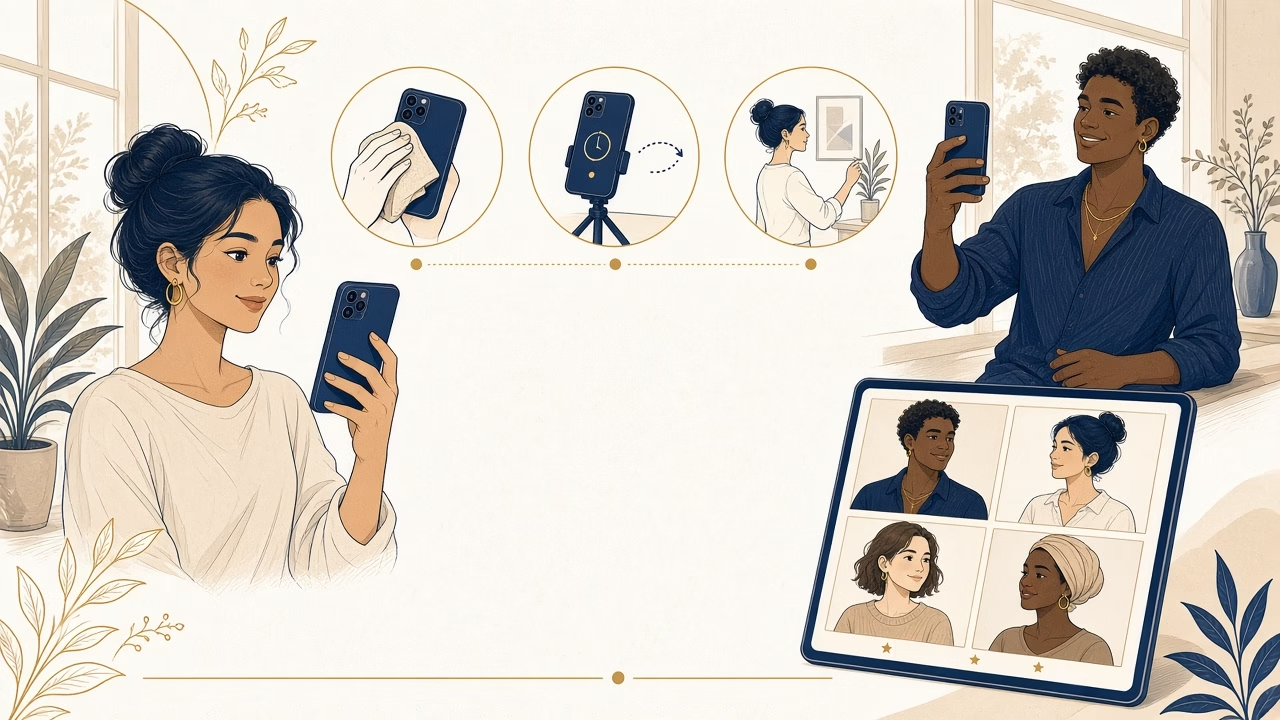
Wipe the lens with a clean microfiber cloth. Fingerprints create haze, low contrast and streaks around lamps. Check that the phone case does not enter the frame and that any lens protector is clean and unscratched.
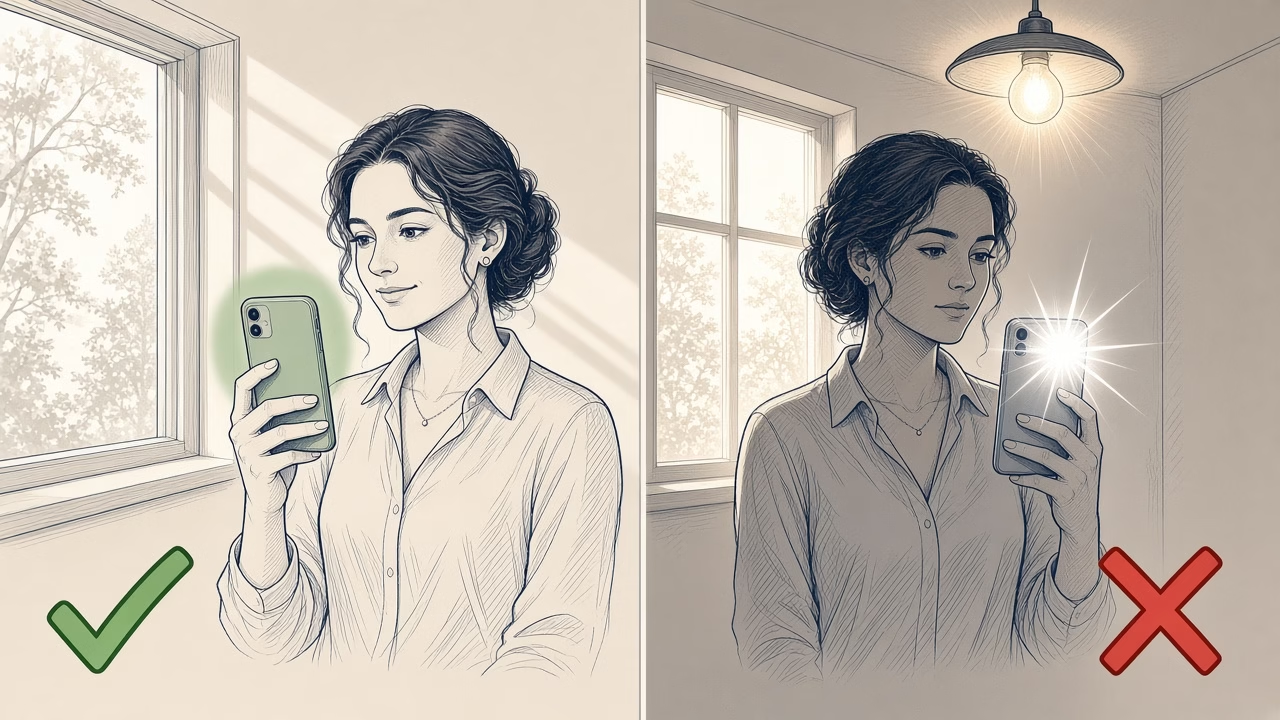
Soft window light is a dependable starting point. Face the window, or turn 30–45 degrees for gentle shape. A pale wall can bounce light onto a darker side. Avoid a bright window directly behind you: backlight may muddy the face or turn the background white.
Overhead midday light produces deep shadows, while light from below can look theatrical. Move into open shade or beside a larger window. A phone’s direct flash often creates shine, hard shadows and a flat result, so use it only when there is no better safe source.
Use a realistic angle, enough distance and the right lens
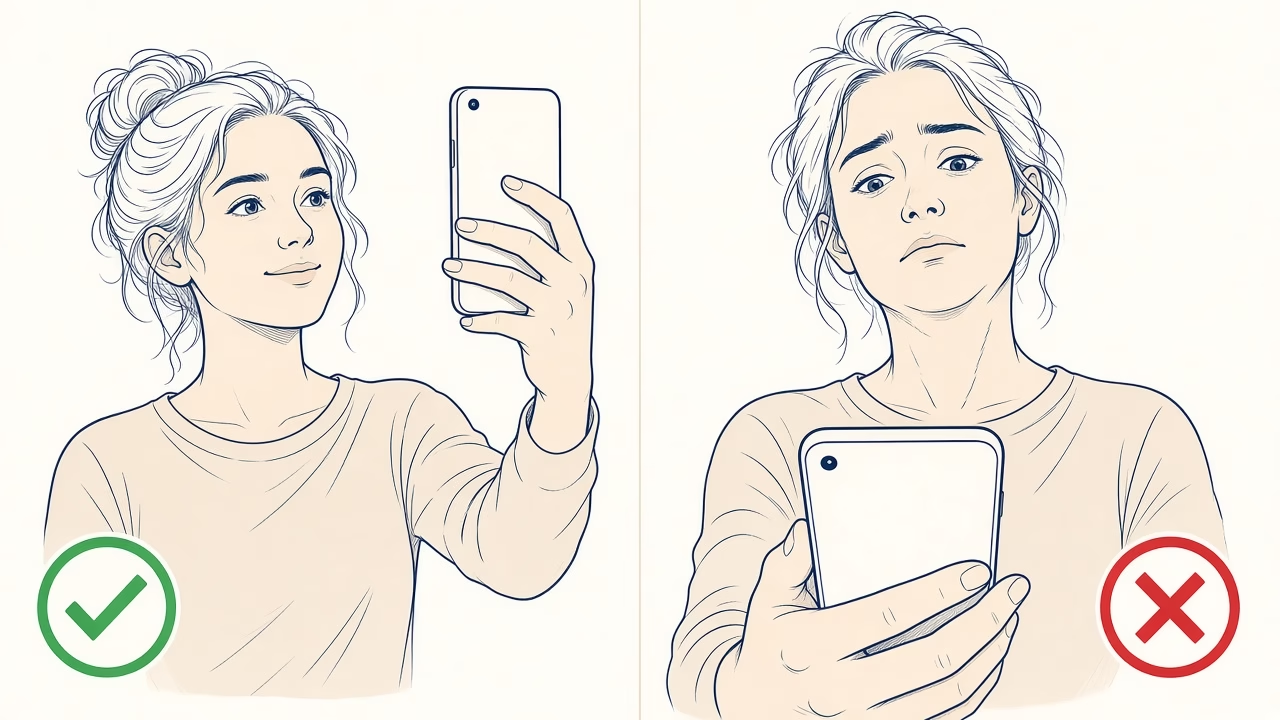
Position the camera slightly above eye level with only a gentle downward angle. Extreme height distorts proportions. Distance matters more: a very close phone enlarges the nearest features. Extend your arm comfortably, or support the phone farther away and crop modestly afterward.
The 1× camera is the best default. A close 0.5× ultrawide stretches central features and faces near the edges. A true optical 2× can give calmer perspective from farther away. Avoid digital zoom, which crops and enlarges while losing detail.
For maximum quality, test the rear camera with a timer; it usually has a stronger sensor and lens. The front camera is easier for quick framing. Check whether it saves mirrored photographs, especially when clothing, signs or products contain text.
Compose the frame, then settle your posture
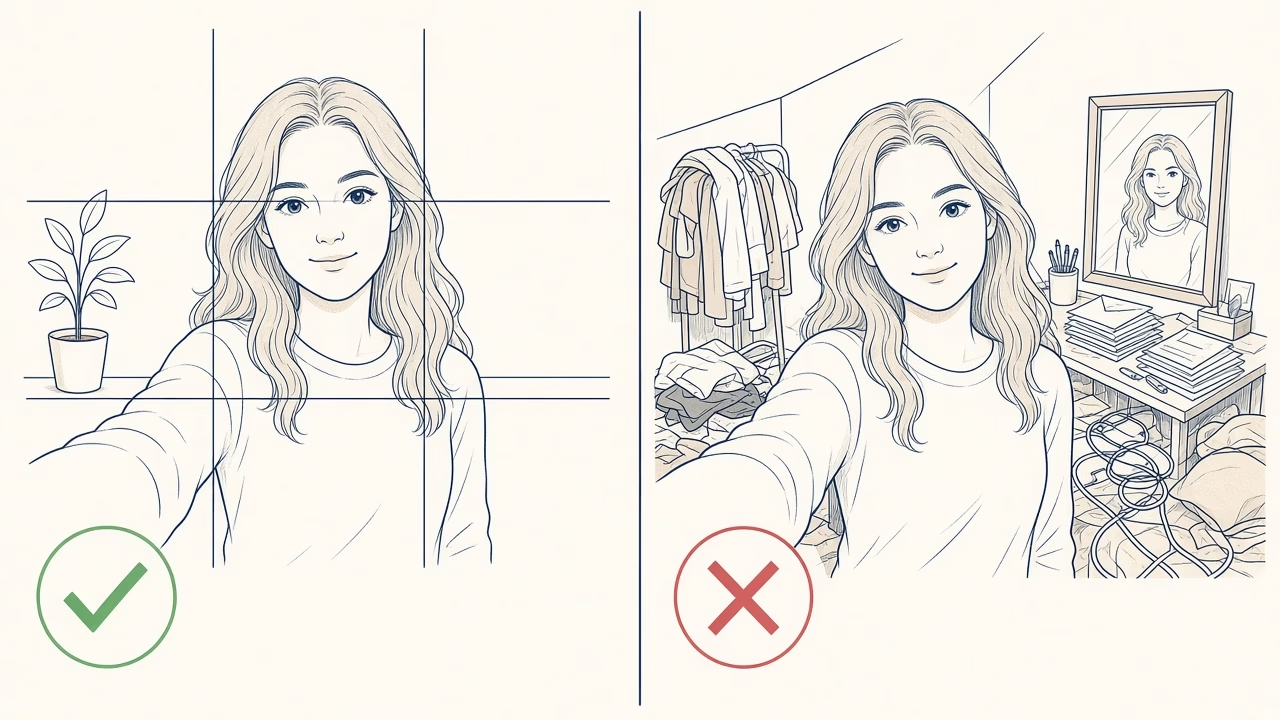
Turn on the grid and place your eyes near the upper horizontal line. Leave modest headroom and avoid accidental cuts through the chin or hair. For a group selfie, keep faces toward the center rather than the outer ultrawide edges, where stretching is strongest.
Drop your shoulders, lengthen your posture comfortably and turn one shoulder slightly toward the camera. A small head turn adds depth; it is not about hiding yourself. Good posture supports comfort and clean visual lines, not rules about how any body should look.
For a natural expression, take an easy breath and press the shutter as you exhale. Look into the camera lens rather than watching yourself continuously on screen. Think of a person or moment you enjoy, or speak to someone nearby, so a smile can develop instead of being held. Burst mode or a Live Photo can capture the brief frame before facial muscles become tense.
Control focus, exposure and the background
Tap the nearer eye on screen to set focus. If the face is too bright, drag the exposure control down slightly; gentle shadows are often easier to lift than blown highlights are to recover. Automatic HDR can balance a bright background and a shaded face, but movement may produce halos or merged details. Hold still and compare one HDR result with a standard frame if your camera application offers that choice.
A simple background keeps attention on the person. Shift small objects that appear to grow out of your head and scan every corner before shooting. For a mirror selfie, clean the mirror and inspect reflections behind you. Hide private papers, screens, addresses, access cards, keys and photographs of people who have not agreed to be included. Consider location safety too: signs, a recognizable view or embedded location data may reveal where you are in real time.
Use simple tools to improve timing
A compact tripod and a two- or ten-second timer give you more distance, relaxed posture and practical access to the rear camera. Put the phone only on a stable surface, away from ledges or places where it could fall. Capture a short burst, but vary your expression or angle slightly instead of filling your library with dozens of identical images.
For night selfies, seek a broad, steady source such as a shop window or well-lit entrance, while keeping pathways clear. Face the light, support the phone and remain still for a moment after pressing the shutter. Night mode needs time and may blur a moving subject, so avoid digital zoom and take a few deliberate frames. If you wear glasses, tilt your chin or phone by a few degrees and move the light off-axis until reflections no longer cover your eyes.
Edit lightly and preserve the useful file
Begin with crop, straightening and white balance so skin and surroundings do not have an unintended blue or orange cast. Small changes to brightness, shadows and contrast are usually sufficient. Avoid tools that reshape a face or body and strong smoothing that erases all skin texture. Pores, lines and small variations are normal detail, not technical defects that must be removed.
Work on a copy and retain the original. For printing, export at original resolution in a high-quality JPEG, or HEIC when the destination supports it. Messaging applications commonly compress photographs, so transfer an important image as a file, through cloud storage or via a download link. Do not use a screenshot of a social post as your print source: it contains fewer pixels and may have passed through several rounds of compression.
Choose a selfie that can print well
Select a frame with sharp eyes, controlled highlights and enough surrounding space for the required crop. As a practical guide, around 1200 × 1800 pixels can serve a 4 × 6 inch print, while roughly 2400 × 3000 pixels gives comfortable detail near 8 × 10 inches. Larger prints may still look good when viewed from farther away, but true sharpness depends on focus, noise and compression as well as pixel count. At FotoPanorama Online Print, you can review available formats and choose an aspect ratio that does not remove important parts of the composition.
A concise pre-shutter checklist
- Clean the lens and find soft light coming from the front or side.
- Choose 1×, add distance and hold the camera slightly above eye level.
- Enable the grid, check headroom and remove distractions from the background.
- Relax your shoulders, turn your head subtly and breathe out.
- Focus on the eye, adjust exposure and use a timer, burst or Live Photo.
- Crop and correct color gently while preserving natural skin texture.
- Keep the full-resolution original before sharing or ordering a print.
Frequently asked questions
What is the best camera angle for a selfie?
Start slightly above eye level without a steep downward tilt. Combine that position with comfortable distance and a subtle head turn.
Why does my nose look larger in close selfies?
Very short camera distance exaggerates perspective. Move the phone farther away and use 1× or true optical 2× instead of close-range 0.5×.
Is the front or rear camera better?
The front camera makes framing easy, while the rear camera usually records more detail. A stable support and timer make the rear option manageable.
How do I prevent glare on my glasses?
Move the light slightly to one side or alter the chin and phone angle by a few degrees until the eyes are unobstructed.
Should I enable HDR for selfies?
Auto HDR helps with high-contrast scenes but is not always needed. Stay still and check that tones and edges remain natural.
How can I take a sharp selfie at night?
Find broad steady light, support the phone, avoid zoom and stay still while night mode completes its longer capture.
Why do selfies lose quality in messages?
Many services reduce dimensions and compression quality. Send the original as a file or cloud link when the photograph is intended for print.
How much filtering is too much?
Prefer modest crop, exposure and color corrections. If texture disappears or facial structure changes, the effect is probably stronger than needed.
Where should I look while taking a selfie?
Look at the lens for direct visual connection. Glance at the screen only briefly to confirm framing and exposure.
What resolution do I need for a print?
It depends on print size, crop and capture quality. Around 1200 × 1800 pixels is a practical starting point for a clear 4 × 6 inch print.
Follow us



Print your selfies online with our application
Upload the original file, choose a print size and submit your order from a phone or computer.
Need help choosing a file or print size? Contact FotoPanorama.